Ribbon Cake Tutorial: Piping With A Petal Tip
  • Comments

Ribbon Cake Tutorial: Piping With A Petal Tip

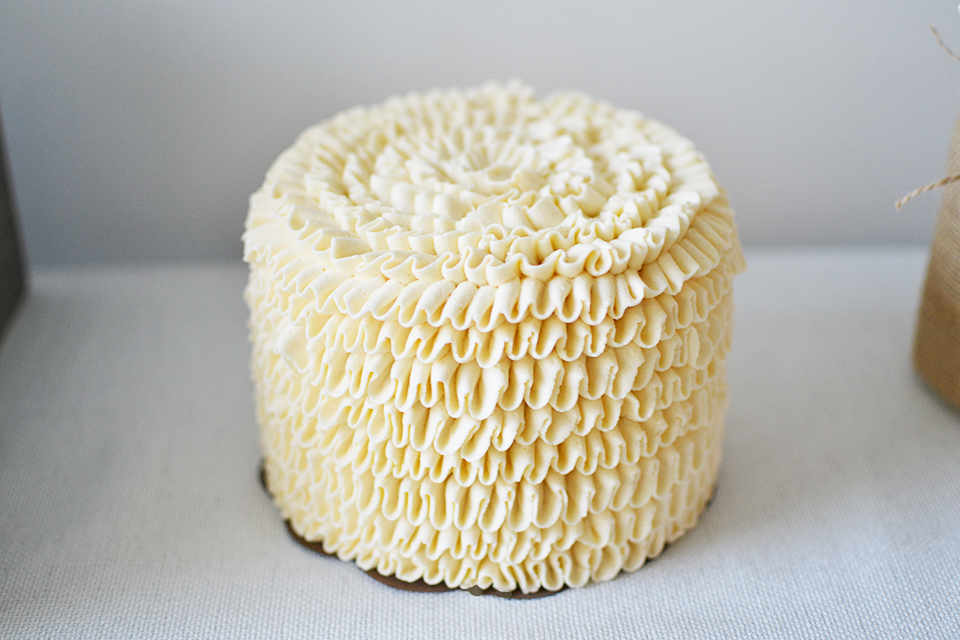
This ribbon cake is a beautiful and elegant cake that will make a wonderful dessert centerpiece for your next party. In this Ribbon Cake Tutorial, you will learn how easy it is to pipe this amazing design that looks like hours of work, but in reality, can be accomplished in just a handful of minutes.

Ribbon Cake Tutorial Supplies

Ribbon Cake Tutorial Step-By Step Directions

1) First things first, start off with a leveled, smoothly iced cake. If you would like to freshen up on some of the basics, check out this free Craftsy class that teaches the basics of leveling, icing, and crumb coating a cake.
Ribbon Cake Tutorial, Piping With A Petal Tip
2) Grab a piping bag fitted with a petal tip and fill it with the frosting of your choice.
Ribbon Cake Tutorial, Piping With A Petal Tip
3) Starting at the bottom of the cake, turn your piping bag perpendicular to the cake, small side of the petal tip pointed toward you. Moving your hand in a small up and down motion begin piping the buttercream with one hand and turning the turntable with the other.
Ribbon Cake Tutorial, Piping With A Petal Tip
4) Continue this motion around the cake until you reach your beginning spot.
Ribbon Cake Tutorial, Piping With A Petal Tip
5) For the next step, go above the line you piped and continue with the same piping technique in step 3.
Ribbon Cake Tutorial, Piping With A Petal Tip
6) Continue piping each line around the cake until you finish with the last line around the SIDE of the cake at the very top (the rim around the topside of the cake).
Ribbon Cake Tutorial, Piping With A Petal Tip
7) Stand back and admire your work. You're not quite done yet, but you're doing great so far!
Ribbon Cake Tutorial, Piping With A Petal Tip
8) Now for the top of the cake. Hold your bag at a slight upright position with the small side of the petal tip facing toward you. Start piping using a side to side motion with one hand as you turn the turntable with the other.
Ribbon Cake Tutorial, Piping With A Petal Tip
9) Starting with the outside circle on the top of the cake, continue each line/circle with this piping motion until you reach the center of the cake - concentric circles to the top middle.
Ribbon Cake Tutorial, Piping With A Petal Tip
10) Voila, you're done! We're sure your hands are tired and your eyes played some tricks on you... but you, your family, and your friends will be so impressed with your decorating skills once you present this cake at your next party/event.
Ribbon Cake Tutorial, Piping With A Petal Tip

Ribbon Cake Tutorial Sweet Notes

Crumb coat your cake in the color of frosting that you're piping with. This way, if spots of the cake show through the ribbon you pipe, it's less noticeable (we kept our cake white so you could see the contrasting colors and better pictures of the piping)
We like to use our Swiss Meringue Buttercream for not only the flavor, but for the way it pipes beautifully onto our cakes. Another good piping buttercream to use is our American Buttercream
Cream cheese frosting and whipped frostings are not good piping frostings, and should be used as the filling if you still want those flavors incorporated
Practice on some parchment paper or a cake board to get the feel of the piping technique. It does take a little time to get used too
This technique does take a lot of frosting, so make sure you make extra when you have this design in mind. For example: our 6-inch, four layered cake, took 3 cups of frosting for the design alone
Have fun with it! The ribbons are forgiving and every line will (most likely) not be perfect... but we also think it's these imperfections that give this cake its charm. Please contact us if you have any questions
comments powered by Disqus